Wildernesses are regions on the map that can be conquered and may be hills, mountains, lakes, forests, plains or bogs (although bogs cannot be attacked and currently serve no function other than filling spaces on the map.) Conquering these regions will improve production of the relevant resource. How much your production is increased depends on the level of the region (level 1 will give you 5% and level 10 will give you 50% more resources; each level gives you 5% more: level x 5 ... e.g. LVL 3 wild x 5 is 15% ). The level of the region determines how hard the region is to conquer and, therefore, how many troops you will need. Before you try to conquer the region, you can scout to get an idea of what kind of troops you will need. In wilderness regions from levels 5 up to 10 you may find crests. They are not random, dropping at a rate of 15%. IE: 100 wilds hit will most likely = 15 crests and the crest that you find will be random, based on the level of wild you attack. The higher your attacking knight's skill and loyalty the more likely he will be to find a crest.
Units in Wilderness
This chart indicates how many troops you will encounter in an unoccupied wilderness:
| Level | Supply Troop |
Militiamen | Scout | Pikemen | Swordsmen | Archer | Cavalry | Heavy Cavalry |
Ballistae | Battering Ram |
Catapult | Traps | Troop Total -w/o traps |
|---|---|---|---|---|---|---|---|---|---|---|---|---|---|
| 1 | 50 | 50 | 100 | ||||||||||
| 2 | 100 | 100 | 50 | 50 | 5 | 300 | |||||||
| 3 | 200 | 200 | 100 | 100 | 50 | 10 | 650 | ||||||
| 4 | 500 | 500 | 200 | 200 | 100 | 50 | 20 | 1,550 | |||||
| 5 | 1000 | 1000 | 500 | 500 | 200 | 100 | 50 | 50 | 3,350 | ||||
| 6 | 1500 | 1500 | 1000 | 1000 | 500 | 200 | 100 | 100 | 5,800 | ||||
| 7 | 3000 | 3000 | 1500 | 1500 | 1000 | 500 | 200 | 50 | 150 | 10,750 | |||
| 8 | 6000 | 6000 | 3000 | 3000 | 1500 | 1000 | 500 | 100 | 50 | 300 | 21,150 | ||
| 9 | 12000 | 12000 | 6000 | 6000 | 3000 | 1500 | 1000 | 200 | 100 | 50 | 600 | 41,850 | |
| 10 | 25000 | 25000 | 12000 | 12000 | 6000 | 3000 | 1500 | 400 | 200 | 100 | 50 | 1200 | 85,250 |
Traps and troops regenerate at a rate of 10% every 6 minutes.[1]
Fighting in the Wilderness
Note that the effectiveness of your troops in battle is determined by the combat skill of both your knight and your research levels in Fletching, Metal Alloys, Poisoned Edge and Healing Potions. You can also enhance your troops battling by applying some items, such as: Blood Lust, Blood Frenzy, Barkskin and Stoneskin.
{C}Send as many militia or supply troops as there are traps in the first wave, and they will all be sacrificed to the traps.
Tip: If you make a mistake with sending the second wave too late or too early, you can substitute scouts for the first wave to prevent the loss of more expensive archers or siege.
Crests in the Wilderness
Starting with the Tournament of Crests, crests started dropping in the game. These are needed to build your third, fourth, fifth, sixth, and seventh cities.
For more information, see crest and Crest_Drop_Research.
Newer Released crests : Galahad, Percival, Lancelot and King Arthur crests are meant to be available in wilds now; they can be found in Lvl 8+ wilds.
Morgana, Mordred, Stag King, Pendragon and Lady of the Lake Seals have also been released. They are found in lvl 8+ wilds and, generally, are harder to find.
Crests and Seals can be found in plains same levels as you would expect in other wilds just more common as less people use them to crest.
New research from confirmed data suggest level 8 has the Highest rate of crest drops for 5th 6th and 7th cities,
KOC can of course change this but to attack any level higher than 8 would make the game difficult if not boring.
Multi-wave Attacks
Your rally point must be at least LVL 2 to send two attacks from the same location. You must also have at least 2 idle knights not assigned to a role or on a march. You need to time the 2 waves so that the archers arrive 1-15 seconds after the militia clear the traps. You need fletching researched to higher than the level of the wilderness you are attacking to limit your losses. Make your 2nd wave march immediately after the 1st wave as traps will begin to respawn within 15-30 seconds and will kill your troops in Wave 2. To help with coordinating march times, send at least one of the slowest type in the first wave along with the second. On attacks with ballistae, add 1 ballista to the militia wave to slow down the first wave. The Troop Speed page has a link to a web-based calculator which includes all skill effects. You can follow the link here: KoC Troop Speed Calculator.
Optimal Situations
It is possible to completely overwhelm any level wilderness to achieve nearly zero lost troops while conquering wildernesses or searching for crests. This also shows practical amounts of troops. Here is a basic chart that indicates the troops needed to defeat different levels:
| Wilderness Level |
Resource Bonus |
Wave 1 - Suicide Squad to use up traps |
Wave 2 - Main Attack |
Troop Losses | Minimum
Fletching |
Rally
Point {C}Leve |
|---|---|---|---|---|---|---|
|
5% | n/a | 160 milita | 8 milita | 0 | 1 |
| 1 | 5% | n/a |
60 swordsmen OR pikes OR 80 archers |
None |
1+ |
1+ |
| 2 |
10% |
5 militia 500 millitia |
130 archers - |
1st Wave 127 millitia |
2+ 0 |
2+ {C}2+ |
| 3 |
15% |
10 militia |
520 archers |
1st Wave |
3+ |
2+ |
| 4 |
20% |
20 militia |
1,600 archers |
1st Wave |
4+ |
2+ |
| 4 |
20% |
20 militia |
1,600 archers |
1st Wave |
4+ |
2+ |
| 4 |
20% |
20 militia |
1,600 archers |
1st Wave |
4+ |
2+ |
| 5 |
25% |
50 militia |
2,200 archers OR 300 ballistae |
1st Wave |
6+ |
2+ |
| 6 | 30% | 100 militia |
3,000 archers OR 700 ballistae |
1st Wave |
7+ |
2+ |
| 7 | 35% |
150 militia |
6,000 archers OR 1,800 ballistae |
1st Wave NOTE: I just tried this and lost 166 archers aswell as the militia - you WILL lose 166 archers if your fletching is not L8 as it says ----> |
8+ |
2+ |
| 8 | 40% |
299 miltia + 1 ballista |
9,111 archers + 1000 ballistae OR 3,300 ballistae |
1st Wave+ 1 archer |
9+ |
2+ |
| 9 | 45% |
599 militia + 1 ballista |
13,137 archers + 1,700 ballistae OR 5,500 ballistae OR
|
1st Wave + 2 archers
|
10 |
2+ |
|
10 |
50% |
1199 militia + 1 catapult {C}2nd Option {C}1200 militia |
35,000 archers + 2,500 catapults OR 10,425 catapults 2nd Option 1 militia + 99,999 archers |
1st Wave + 6 Archers & 50 catapults OR 1st Wave + 50 catapults 2nd Option 1st wave plus 1500 archers |
10 |
4+ |
| 10 | 50% |
1199 Millita men + 1 Catapult Second Option: 1200 militia |
134292 Archers + 11689 Ballista + 4019 Catapults |
4 Archers!! | 11 | 11+ |
- Please someone add these (im not the best at adding collumns) One could also take a lvl 1 plain with 4 ballista or 1 heavy calvalry no minimum fletching
- Note: All combat research such as fletching, metal alloys, poisoned edge, and healing potions should be at least one level above the wilderness level. If all are not then there may be more losses than expected.
- Note: #'s here do not always work as I encountered back to back ballistae on lv 7 and lv 6 wilds containing 399 and 168 respectively. This resulted in a loss of 2446 and 1101 respectively. In addition, the lv 7 lake contained 5000 each of wood, stone, and ore.
- On some domains a handful of wilderness have incorrect troops on them. You may encounter Ballista on lvl 6 and 7 wilds, Catapults on lvl 8 wilds, and a mix of troops meant for lvl 5-7 wilds such as Heavy Cavalry, Archers, and Swordsmen on lvl 1 plains. These wilds should be considered as a bug and avoided during crest hunting.
Note: Please keep attack scenarios low and be practical. Simple and obvious is best. There is no reason for making everyone buy 3 DI's. Low level wilds are fine; don't mess with them. Please, make everything have the lowest complexity possible.
Alternatives with Losses
The table below shows options for when circumstances are less than perfect and the player considers some losses as acceptable. Not recommended for sustainable crest hunting.
| Wilderness Level | Resource Bonus | Wave 1 | Wave 2 | Troop Losses |
F letching |
Rally | Comments | ||||||||
|---|---|---|---|---|---|---|---|---|---|---|---|---|---|---|---|
| 7 | 35% |
|
|
10 | 9 |
Single Wave Crest Hunting
| |||||||||
| 8 | 40 | 299MM + 1 Ballista | 8000 Archers + 800 Ballistas |
|
8 | 8 |
2 wave Cresting
| ||||||||
| 8 | 40% |
80k MM + 9k archers + 1k ballistae
|
267 MM + 31 archers + 4 ballistae
|
10 |
9
|
Single Wave Crest Hunting
| |||||||||
| 8 | 40% | 11,750 archers | 775 archers | 9 | 2+ | Fast hunting | |||||||||
| 8 | 40% | 299 MM | 1 MM + 11,500 archers | 475 archers | 9 | 2+ | |||||||||
| 9 | 45% | 599 MM | 1 MM + 43,425 archers | 1,063 archers | 9 | 5+ | Note equal fletching levels of player and wilderness. | ||||||||
| 9 | 45% | 599 MM | 1 MM + 65,000 archers | 923 archers | 9 | 5+ | Note equal fletching levels of player and wilderness. | ||||||||
| 9 | 45% | 599 MM + 1 ballista | 20,000 archers + 2,000 ballistae | 2 archers + 100 ballistae | 9 | 4+ | Note equal fletching levels of player and wilderness. | ||||||||
|
9 |
45% |
24,000 archers
|
1383 archers
|
10 | 8+ | Fast hunting | |||||||||
| 9 | 45% | 600 MM | 1 MM + 27,000 archers | 783 archers | 10 | 3+ | |||||||||
| 10 | 50% | 1199 MM + 1 ballista | 37,500 archers + 2,000 ballistae | 1,006 Archers + 450 ballistae | 9 | 4+ | Take note of lvl 9 Fletching | ||||||||
| 10 | 50% | 1,199 MM + 1 ballista | 23,000 ballistae | 402 ballistae | 10 | 3+ | Worst possible method. Archers only is cheaper resource-wise. | ||||||||
|
10 |
50% | 1,200 MM | 1 MM + 63,000 archers | 2,126 archers | 10 | 7+ | Least possible losses without catapults. | ||||||||
| 10 | 50% |
1200 MM 1 Cata[ult |
12000 Ballista + 30000 Cataputls |
50 Catapults | 10 | 11 |
Level 10 Guardian (+20% HP) Knight with 168 points | ||||||||
|
10 |
50% |
1199 MM 1 ballista |
63,000 archer 10,000 ballistae |
1006 archer 400 ballistae |
10 | 8+ |
Level 9 Guardian, knight with 99 skill. | ||||||||
|
10 |
50% |
1199 MM 1 Ballista |
63,000 Archer 10,000 Ballista |
1005 Archer 300 Ballista |
11 |
10 |
Level 9 Guardian Knight 114 | ||||||||
| 10 | 50% | 1199MM 1 catapult |
30,000 Ballista / 6,000 Catapult / 300 Ram |
First Wave | 11 | 10 |
L10 Guardian Second wave knight combat skill 143 |
|
10 |
50% |
1199mm+1cat |
15000ballista 5000ram 15000 cat |
First Wave Only
no losses |
11 |
10 |
Level 9 Guardian Knight 114 Minimum i have done it with EJIZ 42 |
- add these to wiki, im not good at source coding. 50k scouts can take only 60 scout losses lvl 4 guardian and lvl 9 healing potions. also, 1000 scouts can have a loss of 125 scouts same losses. very good for quick take for a lvl 1 plain for a far away city
If you abandon a wilderness, it replenishes troops, loot, and crests immediately. It is possible to quickly secure and abandon wildernesses close to a city to reduce marching times and gather crests rather quickly.
As an alternative method to losing a siege weapon (ballista or catapult) in the first wave with your militia, you can send your slower wave first. By doing this you can view the "Troop Activity" tab and time your second wave of pure militia to hit first. This way you lose one more militia man and no siege weapon for the trap clearing.
Example: Level 8 Wilderness suggests "wave 1: 299 militias + 1 ballista and wave 2: 12000 archers + 800 ballistae." - You lose 299 militias and 1 ballista from the first wave and 1 archer from the second.
Using the alternative method "wave 1: 12000 archers + 800 ballistae and wave 2: 300 militias" - You lose all of the second wave (militiamen) and only 1 archer in the first wave.
This method requires you to monitor the march times so you can send the militiamen marching so they hit 1-30 seconds prior to the first wave. The 2nd wave must hit first in this case.
There is a troop marching speed calculator here.
- Fighting in the Wilderness (additional)
- Please contribute to Wilderness Research (For lv 8-10 Research).
Types of Wildernesses
Mountains
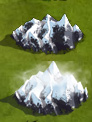 |
Mountains increase your ore production. |
Woods
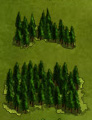 |
Woods increase your wood production. |
Hills
 |
Hills increase your stone production. |
Grasslands

|
Grasslands increase your food production. |
Lakes
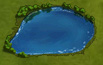 |
Lakes increase your food production. |
Plains
 |
Plains are where you build new cities. |
Bogs
 |
Bogs are impenetrable wilds. They cannot be conquered or attacked.
|
Owning a Wilderness
For each city, you can own one wilderness per level of your castle. The level of your castle does not affect the levels of wildernesses you can own. For example, if you have a Lvl 7 castle, you may own up to 7 wildernesses of any type and any level. The exception to this is a Lvl 11 castle which may own up to 12 wildernesses.
You can attack a wildernesses with all your slots filled but you won't be able to conquer them (ie. you will not receive the percentage increase in productivity and you will not fulfill a quest). You may be able to win the battle and "secure" the wilderness but you will not "conquer" it. However, even wilds that you cannot own may contain crests and do contain very small resource deposits, both of which will be claimed after securing the location.
If you conquer a wilderness, your troops will remain in the wilderness to defend it. You must recall them to have them return to your city. If you do not conquer the wilderness, your troops return automatically.
Since July 20th, 2010 you can defend your wildernesses by adding traps or hiring mercenaries.
For Information on defending your Wildernesses, see Owned Wilderness Defenses