(Adding categories) |
|||
| Line 32: | Line 32: | ||
|align="center" valign="middle"|4 |
|align="center" valign="middle"|4 |
||
|align="center" valign="middle"|20% |
|align="center" valign="middle"|20% |
||
| − | |align="center" valign="middle"|600 Archers, Lv4+ Fletching |
+ | |align="center" valign="middle"|600 Archers, Lv4+ Fletching |
|align="center" valign="middle"| |
|align="center" valign="middle"| |
||
|- |
|- |
||
| Line 66: | Line 66: | ||
|} |
|} |
||
| − | * |
+ | *Courtesy of Lady Sarena of Council of Elders |
| + | |||
| + | |||
| + | |||
| + | This chart indicates how many troops you will encounter in an unoccupied wilderness: |
||
| + | |||
| + | {| border="1" class="sortable" id="kcwildbarbtable" |
||
| + | |- class="even" |
||
| + | ! style="text-align: left; "|Level |
||
| + | ! style="text-align: left; "|Supply<br />Troop |
||
| + | ! style="text-align: left; "|Militiamen |
||
| + | ! style="text-align: left; "|Scout |
||
| + | ! style="text-align: left; "|Pikemen |
||
| + | ! style="text-align: left; "|Swordmen |
||
| + | ! style="text-align: left; "|Archer |
||
| + | ! style="text-align: left; "|Cavalry |
||
| + | ! style="text-align: left; "|Heavy<br />Cavalry |
||
| + | ! style="text-align: left; "|Ballista |
||
| + | ! style="text-align: left; "|Battering<br />Ram |
||
| + | ! style="text-align: left; "|Catapult |
||
| + | |- class="odd" |
||
| + | |1 |
||
| + | |50 |
||
| + | |50 |
||
| + | | |
||
| + | | |
||
| + | | |
||
| + | | |
||
| + | | |
||
| + | | |
||
| + | | |
||
| + | | |
||
| + | | |
||
| + | |- class="even" |
||
| + | |2 |
||
| + | |100 |
||
| + | |100 |
||
| + | |50 |
||
| + | |50 |
||
| + | | |
||
| + | | |
||
| + | | |
||
| + | | |
||
| + | | |
||
| + | | |
||
| + | | |
||
| + | |- class="odd" |
||
| + | |3 |
||
| + | |200 |
||
| + | |200 |
||
| + | |100 |
||
| + | |100 |
||
| + | |50 |
||
| + | | |
||
| + | | |
||
| + | | |
||
| + | | |
||
| + | | |
||
| + | | |
||
| + | |- class="even" |
||
| + | |4 |
||
| + | |500 |
||
| + | |500 |
||
| + | |200 |
||
| + | |200 |
||
| + | |100 |
||
| + | |50 |
||
| + | | |
||
| + | | |
||
| + | | |
||
| + | | |
||
| + | | |
||
| + | |- class="odd" |
||
| + | |5 |
||
| + | |1000 |
||
| + | |1000 |
||
| + | |500 |
||
| + | |500 |
||
| + | |200 |
||
| + | |100 |
||
| + | |50 |
||
| + | | |
||
| + | | |
||
| + | | |
||
| + | | |
||
| + | |- class="even" |
||
| + | |6 |
||
| + | |1500 |
||
| + | |1500 |
||
| + | |1000 |
||
| + | |1000 |
||
| + | |500 |
||
| + | |200 |
||
| + | |100 |
||
| + | | |
||
| + | | |
||
| + | | |
||
| + | | |
||
| + | |- class="odd" |
||
| + | |7 |
||
| + | |3000 |
||
| + | |3000 |
||
| + | |1500 |
||
| + | |1500 |
||
| + | |1000 |
||
| + | |500 |
||
| + | |200 |
||
| + | |50 |
||
| + | | |
||
| + | | |
||
| + | | |
||
| + | |- class="even" |
||
| + | |8 |
||
| + | |6000 |
||
| + | |6000 |
||
| + | |3000 |
||
| + | |3000 |
||
| + | |1500 |
||
| + | |1000 |
||
| + | |500 |
||
| + | |100 |
||
| + | |50 |
||
| + | | |
||
| + | | |
||
| + | |- class="odd" |
||
| + | |9 |
||
| + | |12000 |
||
| + | |12000 |
||
| + | |6000 |
||
| + | |6000 |
||
| + | |3000 |
||
| + | |1500 |
||
| + | |1000 |
||
| + | |200 |
||
| + | |100 |
||
| + | |50 |
||
| + | | |
||
| + | |- class="even" |
||
| + | |10 |
||
| + | |25000 |
||
| + | |25000 |
||
| + | |12000 |
||
| + | |12000 |
||
| + | |6000 |
||
| + | |3000 |
||
| + | |1500 |
||
| + | |400 |
||
| + | |200 |
||
| + | |100 |
||
| + | |50 |
||
| + | |} |
||
| + | |||
==Types of Wilderness== |
==Types of Wilderness== |
||
Revision as of 04:33, 15 February 2010

Wilderness regions are uncontrolled regions on the Map, and may be hills, mountains, lakes, etc. Conquering these regions will improve production of the relevant resource. How much your production is increased depends on the level of the region. The level of the region impacts how hard the region is to conquer and how many troops you will need. You can scout before you try to conquer the region to get an idea of what kind of troops you will need.
Table of levels
Here is a basic chart that indicates the properties of different levels:
| Level | % Increase | # Troops needed | Comments |
|---|---|---|---|
| 1 | 5% | 50 Archers, Lv1+ Fletching | |
| 2 | 10% | 100 Archers, Lv2+ Fletching | |
| 3 | 15% | 260 Archers, Lv3+ Fletching | |
| 4 | 20% | 600 Archers, Lv4+ Fletching | |
| 5 | 25% | 1400 Archers, Lv5+ Fletching | |
| 6 | 30% | 3300 Archers, Lv6+ Fletching | |
| 7 | 35% | 7700 Archers, Lv7+ Fletching | |
| 8 | 40% | ||
| 9 | 45% | ||
| 10 | 50% |
- Courtesy of Lady Sarena of Council of Elders
This chart indicates how many troops you will encounter in an unoccupied wilderness:
| Level | Supply Troop |
Militiamen | Scout | Pikemen | Swordmen | Archer | Cavalry | Heavy Cavalry |
Ballista | Battering Ram |
Catapult |
|---|---|---|---|---|---|---|---|---|---|---|---|
| 1 | 50 | 50 | |||||||||
| 2 | 100 | 100 | 50 | 50 | |||||||
| 3 | 200 | 200 | 100 | 100 | 50 | ||||||
| 4 | 500 | 500 | 200 | 200 | 100 | 50 | |||||
| 5 | 1000 | 1000 | 500 | 500 | 200 | 100 | 50 | ||||
| 6 | 1500 | 1500 | 1000 | 1000 | 500 | 200 | 100 | ||||
| 7 | 3000 | 3000 | 1500 | 1500 | 1000 | 500 | 200 | 50 | |||
| 8 | 6000 | 6000 | 3000 | 3000 | 1500 | 1000 | 500 | 100 | 50 | ||
| 9 | 12000 | 12000 | 6000 | 6000 | 3000 | 1500 | 1000 | 200 | 100 | 50 | |
| 10 | 25000 | 25000 | 12000 | 12000 | 6000 | 3000 | 1500 | 400 | 200 | 100 | 50 |
Types of Wilderness
Mountains
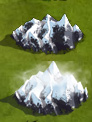 |
Mountains increase your ore production. |
Woods
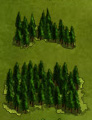 |
Woods increase your wood production. |
Hills
 |
Hills increase your stone production. |
Grasslands
 |
Grasslands increase your food production. |
Lakes
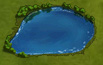 |
Lakes increase your food production. |
Plains
 |
Plains are where you build new cities. |
Bogs
 |
Bogs are impenetrable, and cannot be conquered. |